Fiuu VT+
The Fiuu VT+ is a production-ready solution designed to seamlessly integrate with cloudECR, enabling secure and efficient electronic cash register operations. This terminal is optimized for real-time transactions and ensures compliance with cloudECR standards.
Key Features
- Production-Ready: Fully tested and certified for live environments.
- Cloud Integration: Direct connectivity with cloudECR for transaction synchronization.
- User-Friendly: Simple activation and configuration steps.
Steps to Use and Test Integration
1. Download the VT+ App
- Visit your device’s app store (Apple App Store or Google Play Store).
- Search for Fiuu VT+ and download the latest version.
2. Generate VT+ account
-
Log in to the Merchant Portal and navigate to VT Activation > List section, click on + New VT Terminal button and confirm the creation.
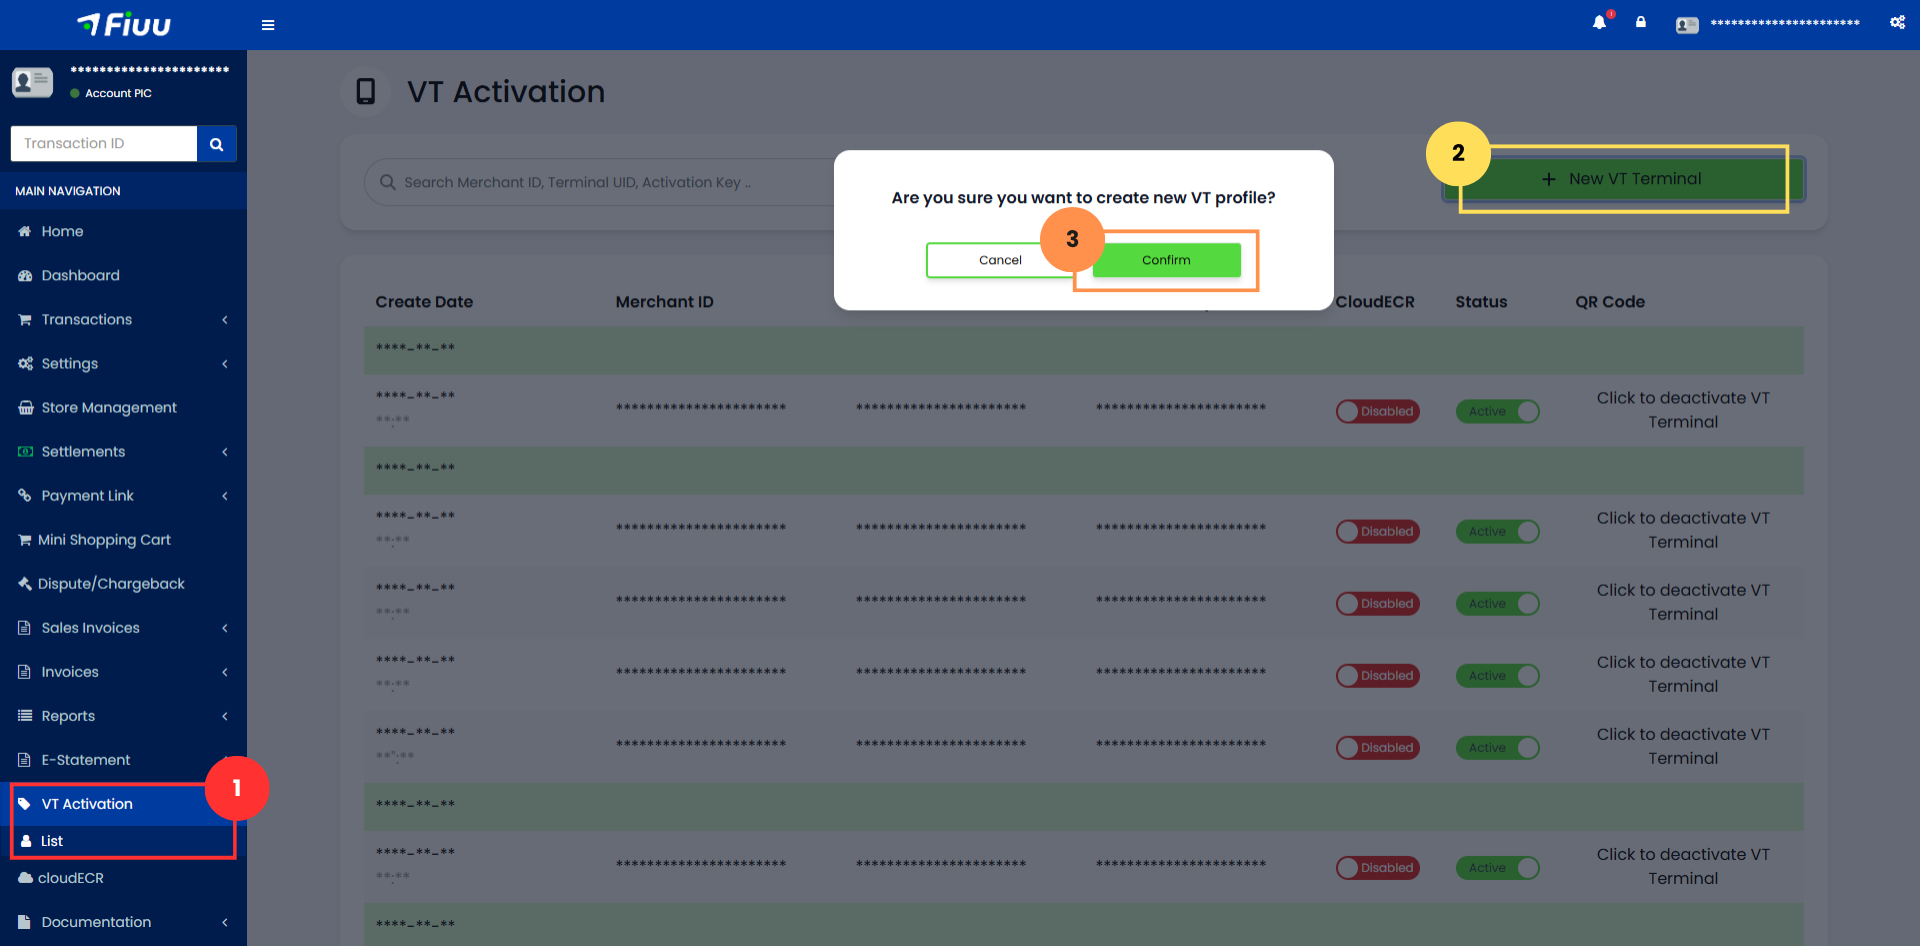
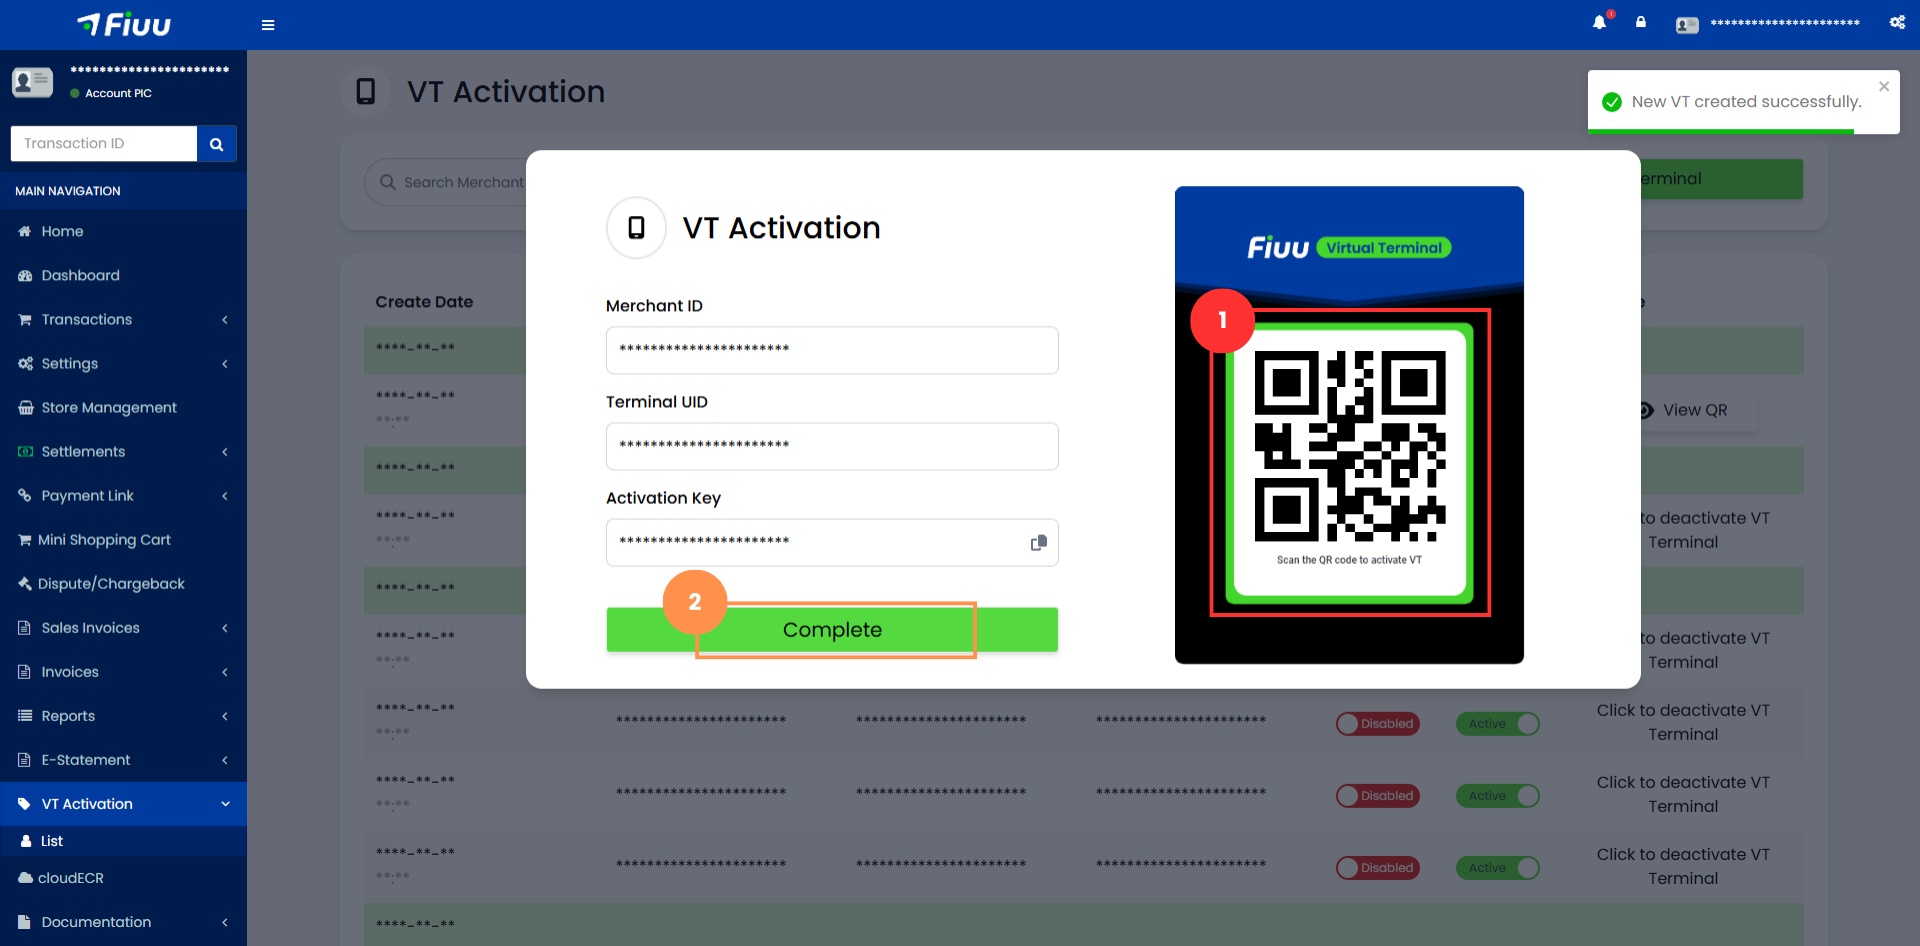
-
Save the generated QR code for later use and click Complete.
-
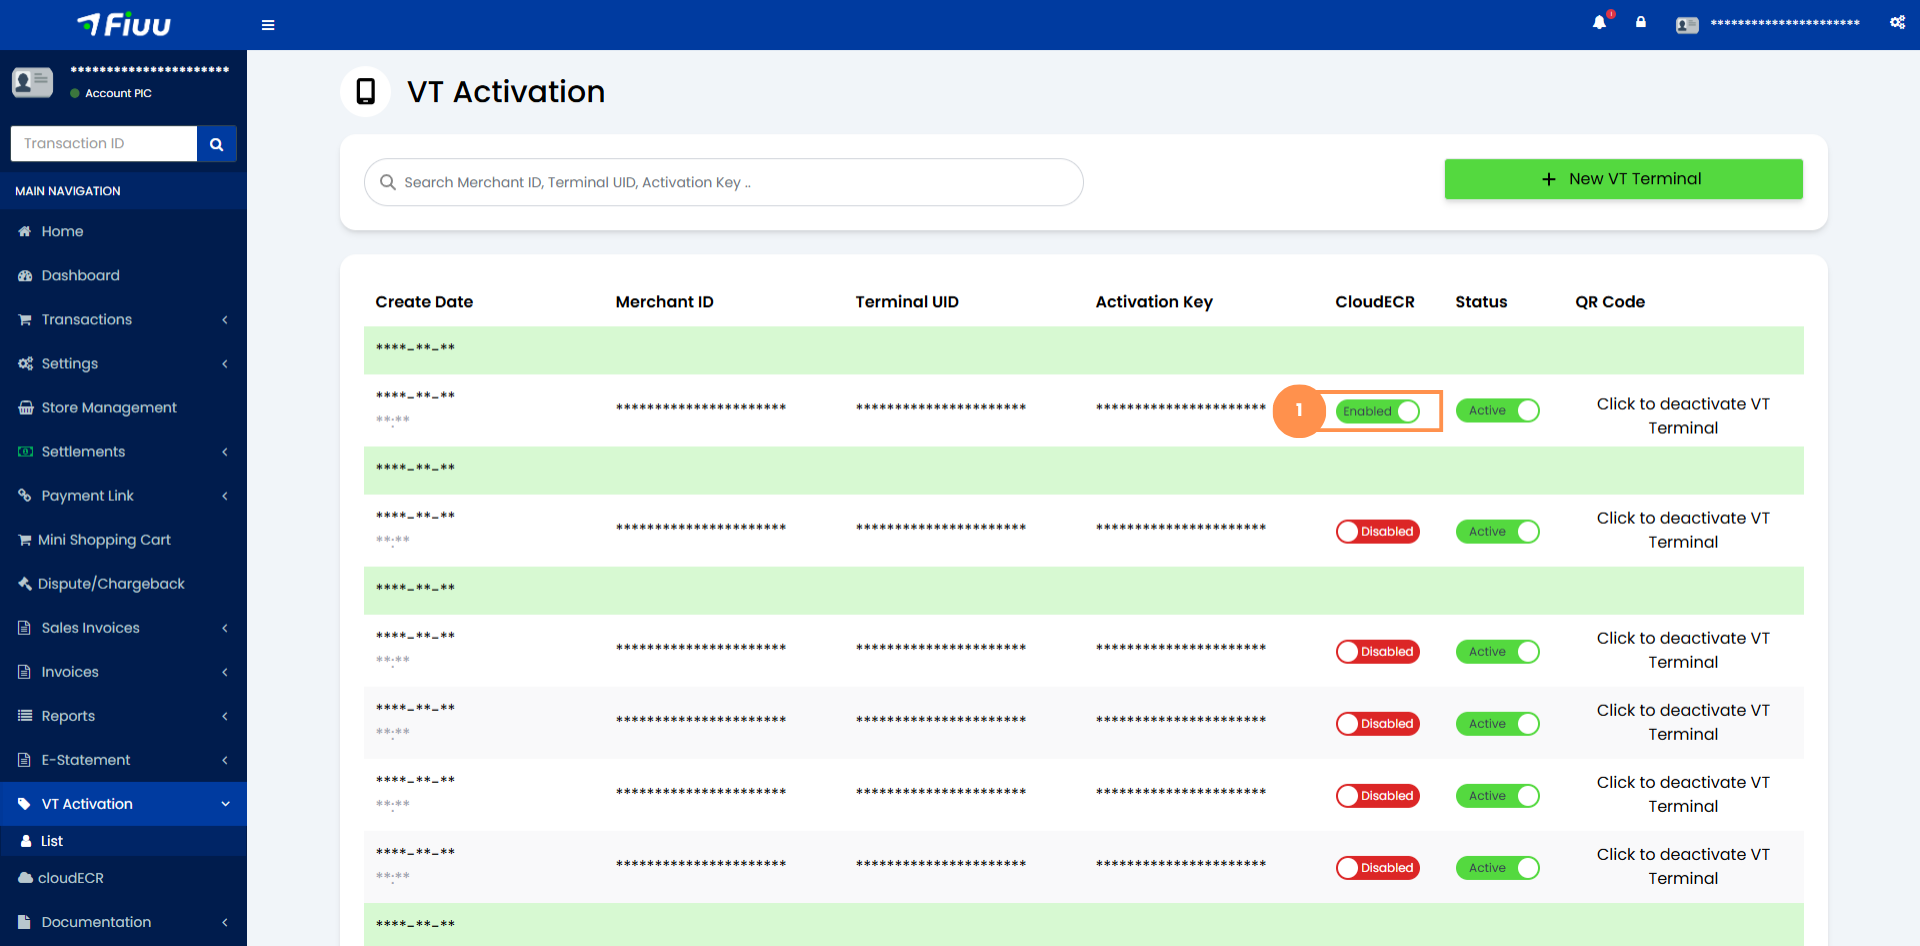
To enable cloudECR integration, toggle the Enable cloudECR option.
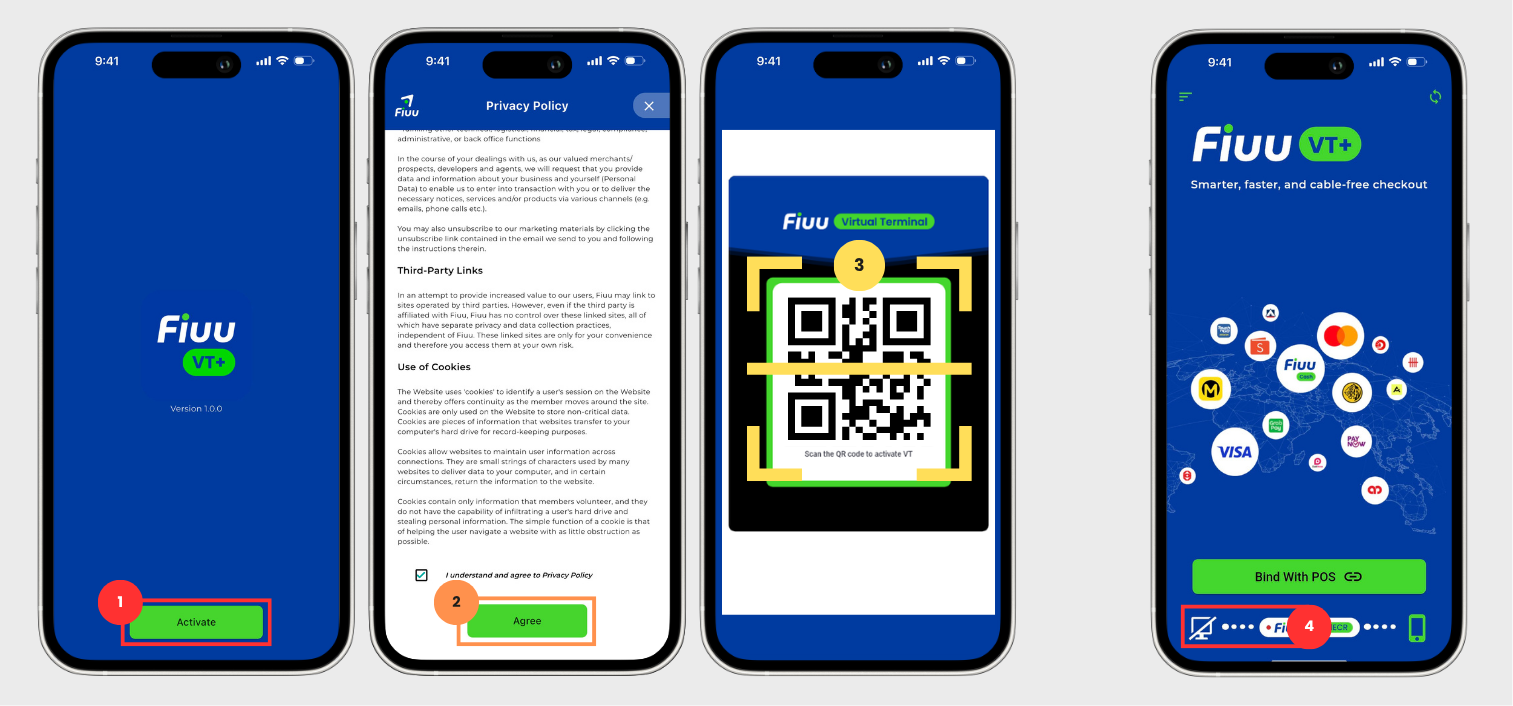
3. Activate the Terminal
-
Open the VT+ app and tap Activate.
-
Review the Privacy Policy, check the agreement box, and tap Agree.
-
Scan the saved QR code and set your application passcode.
-
The terminal status will initially show Offline, as no POS is yet bound.
4. Bind the Terminal
4.1 QR Scan Binding
QR Scan Binding allows the application to pair with the POS terminal by scanning a QR code generated from the POS system. The QR code contains the necessary identification details, enabling the application to establish the connection automatically.
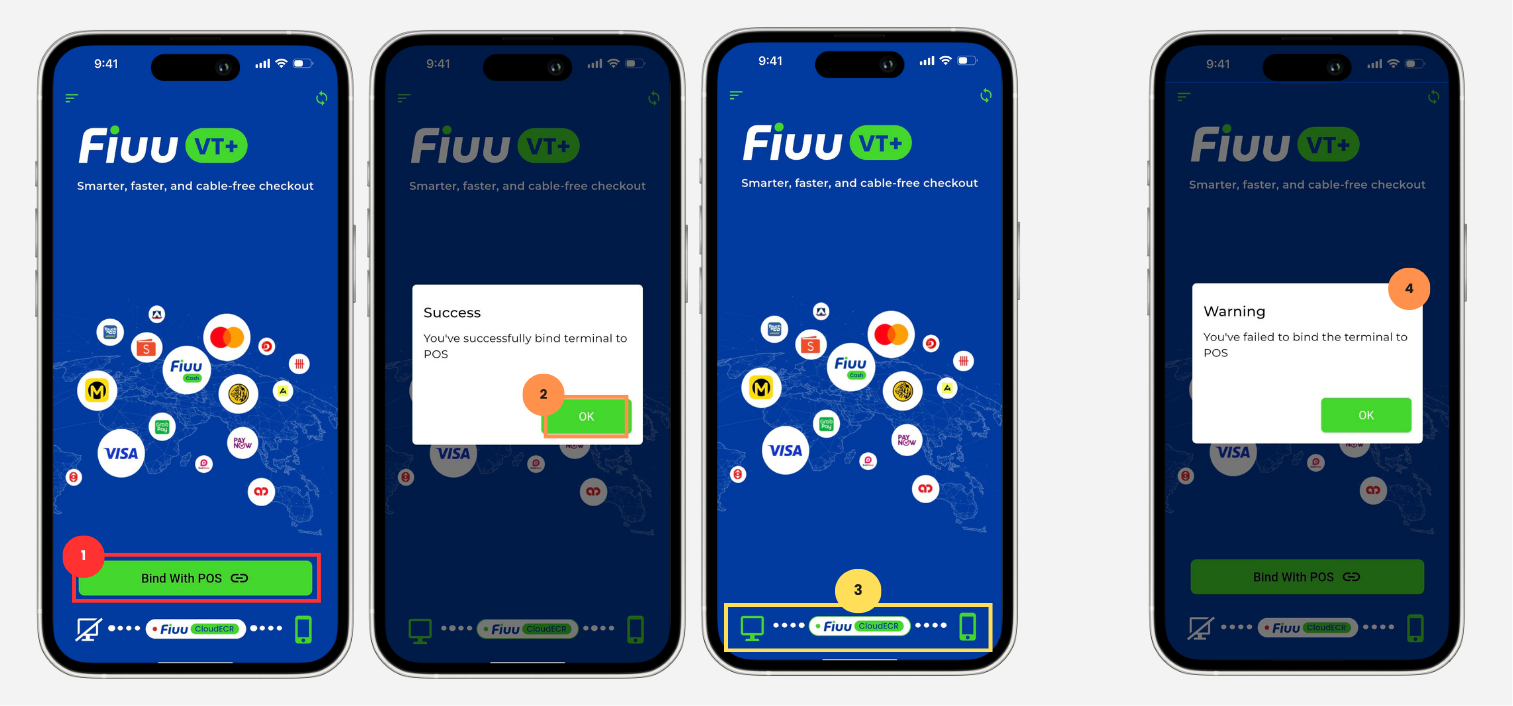
Steps
- In the application, tap Bind with POS.
- Scan the QR Code generated by the POS system and wait for the system to process the binding request.
- Confirm that the binding is successful by checking the POS and cloudECR status.
Notes
- Ensure the QR code displayed on the POS system is clearly visible and not expired before scanning.
- If the binding is unsuccessful, the message shown in Step 4 of the diagram will appear.
4.2 Express Binding
Express Binding allows the application to quickly bind to a terminal that has already been preassigned in the Merchant Portal. Once triggered, the system will automatically locate the prebound terminal and complete the binding process without
Prerequisite
- The target terminal must be assigned through Prebind selection before proceeding. Skipping this will result in the Express Bind button not appearing.
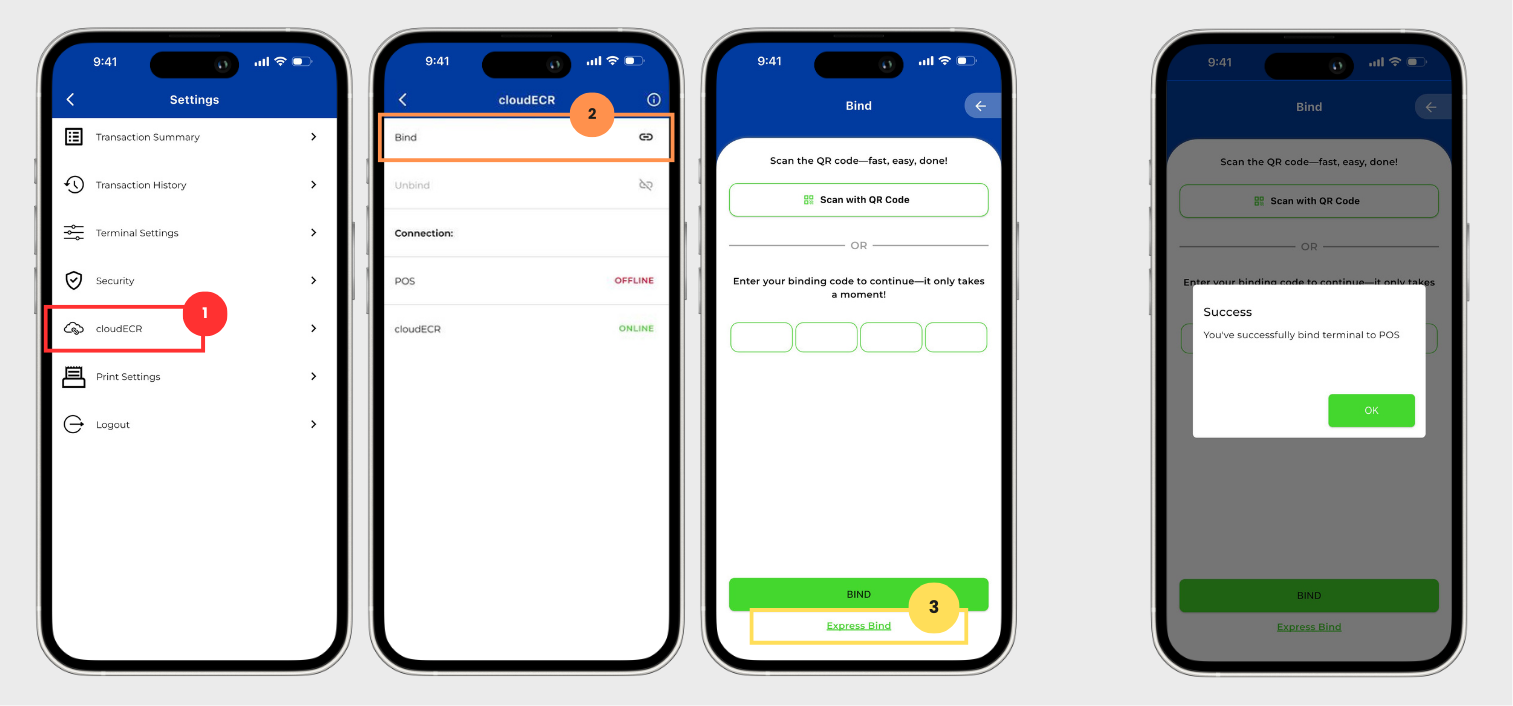
Steps
- In the application, tap Settings at the top left corner, then select cloudECR from the settings menu.
- Tap the Bind button.
- Tap Express Bind to initiate the binding process.
For more details, see the Bind Terminal section.
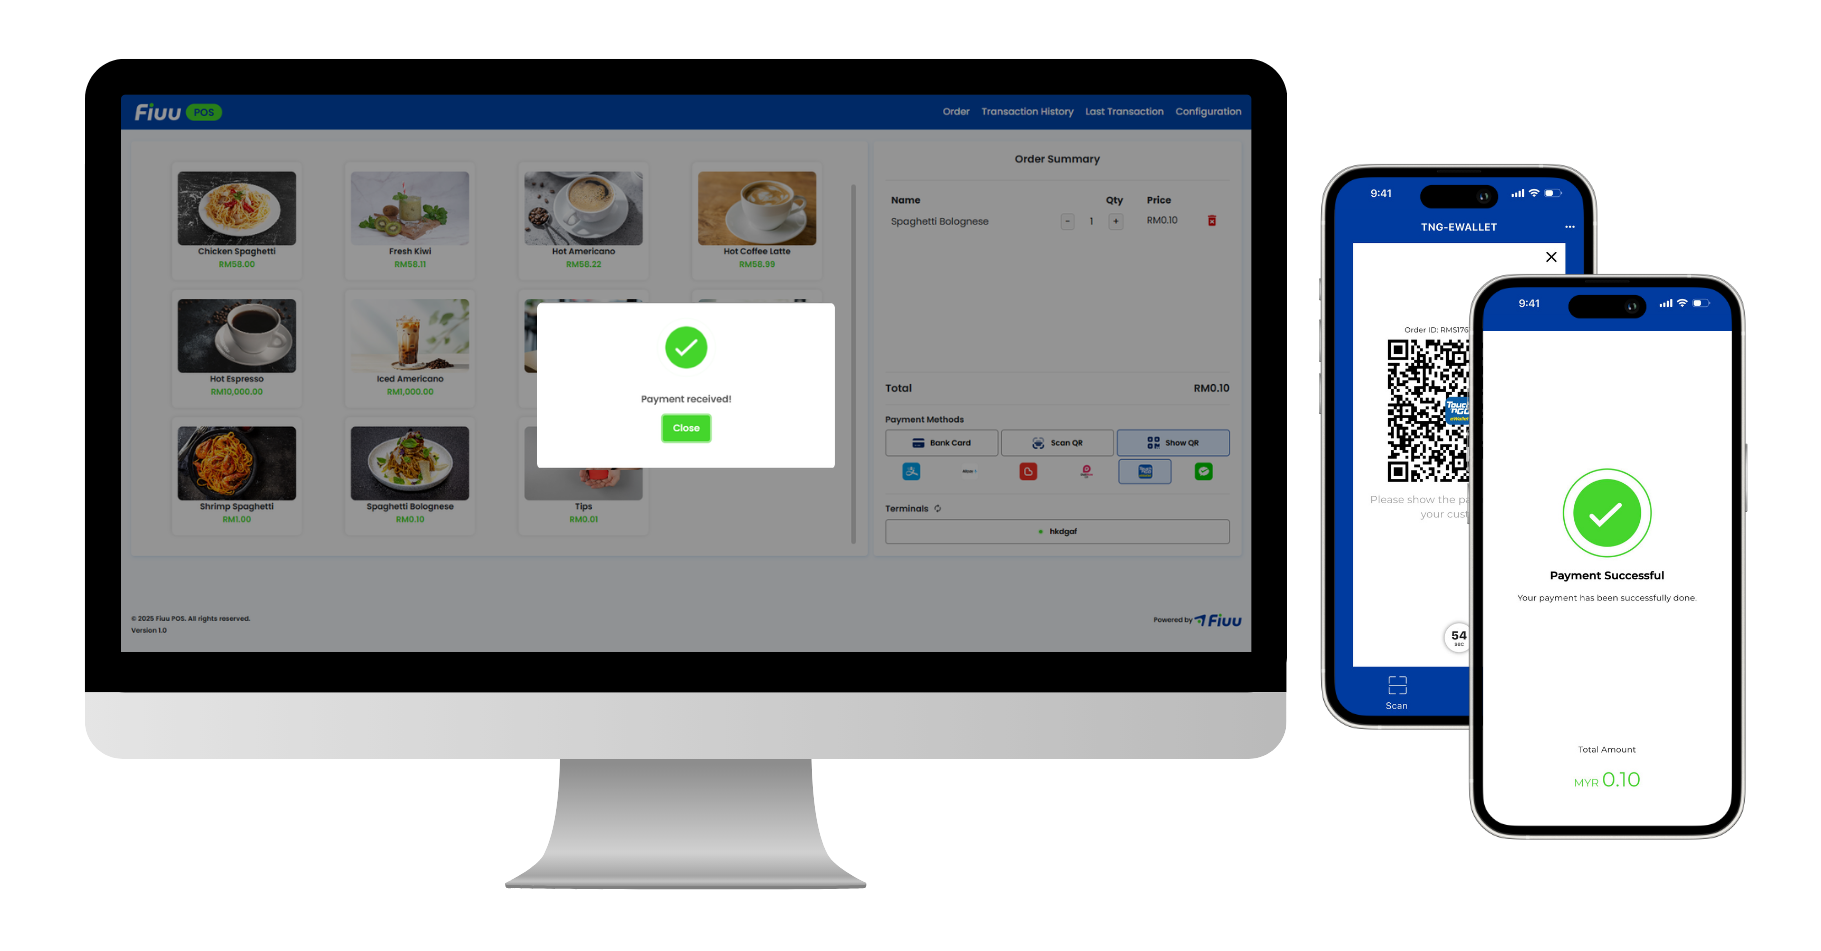
5. Perform Transfer Test
-
Initiate a Test Transaction from the POS.
-
Ensure the transaction flows as follows:
POS → Terminal (processing) → Terminal → POS (response) -
Sample Sale test:
-
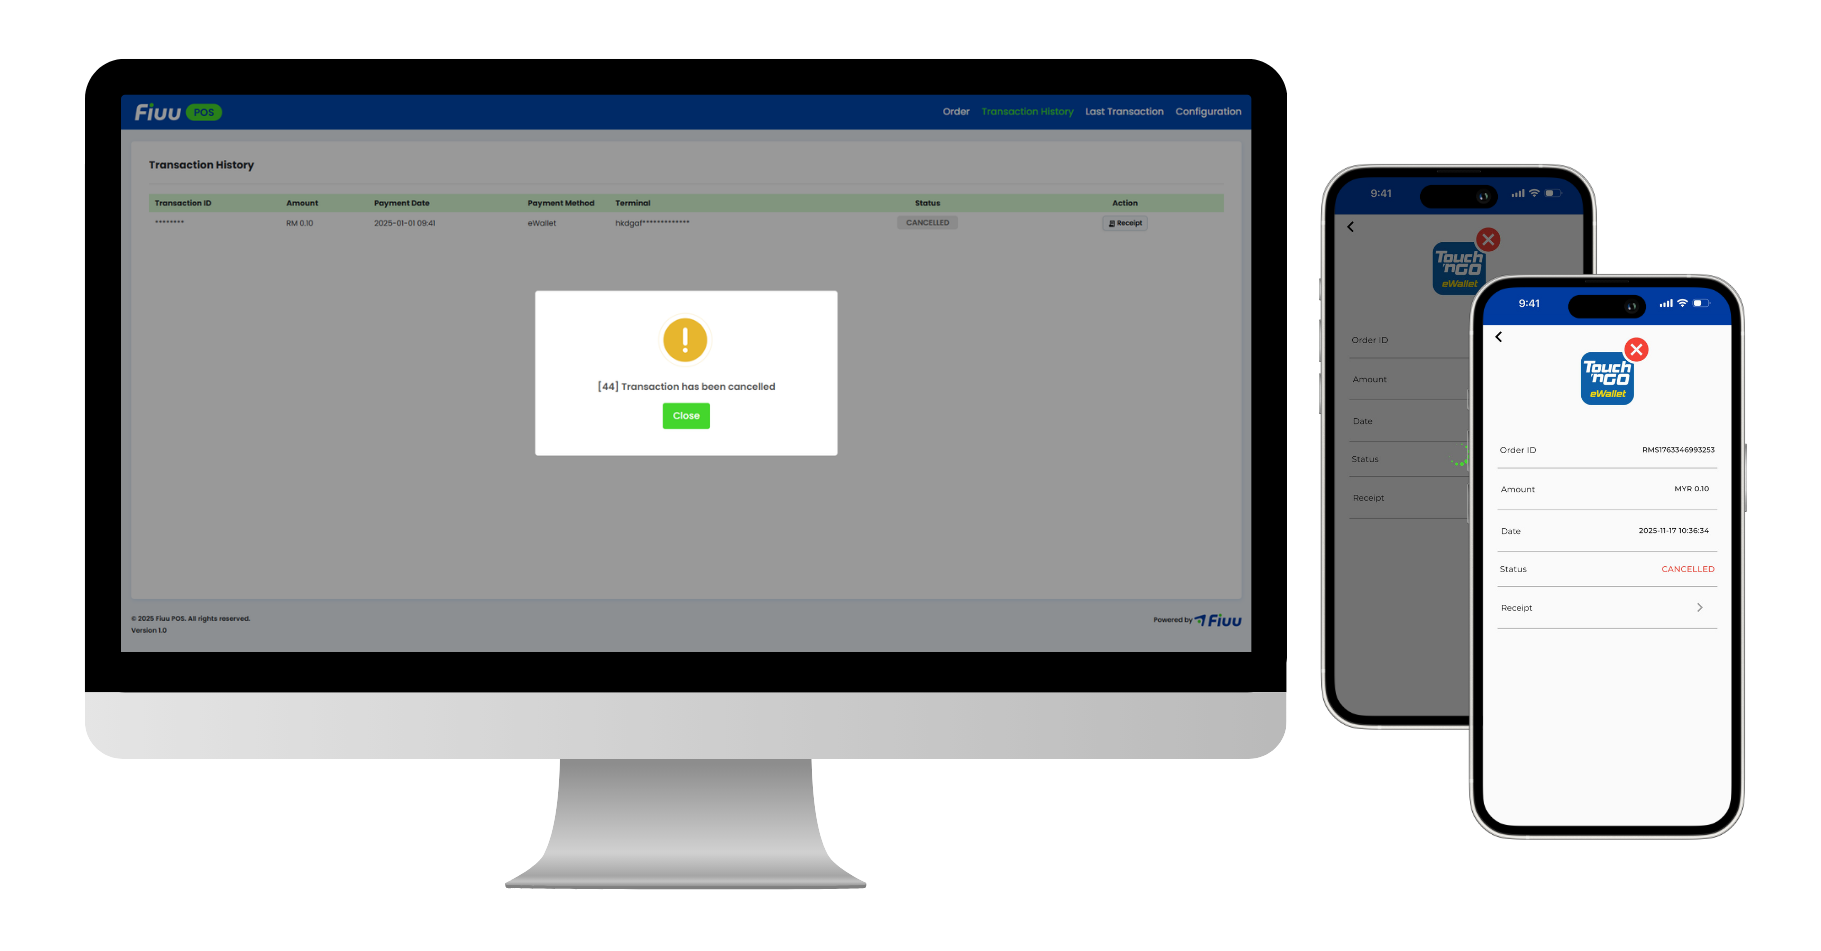
Sample Void test:
6. Troubleshooting
- Connection Issues: Ensure a stable internet connection and correct merchant account credentials.
- Binding Errors: Double-check cloudECR settings and retry the binding process.
- For persistent issues, contact Support and provide error logs.
Best Practices
- Always keep the terminal app updated.
- Regularly monitor transaction logs for discrepancies.
- Perform periodic test transactions after major updates.